Learn step by step
Select the type of installation you wish to perform
Before you begin installation with a QR code, there are a few important points to be aware of:
- A strong internet connection
- Ideally using a Wifi network or a good 4G connection
- An eSIM compatible device
Activation guide for your eSIM

01
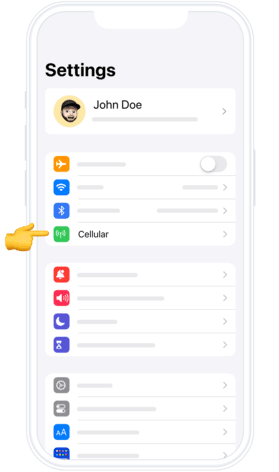
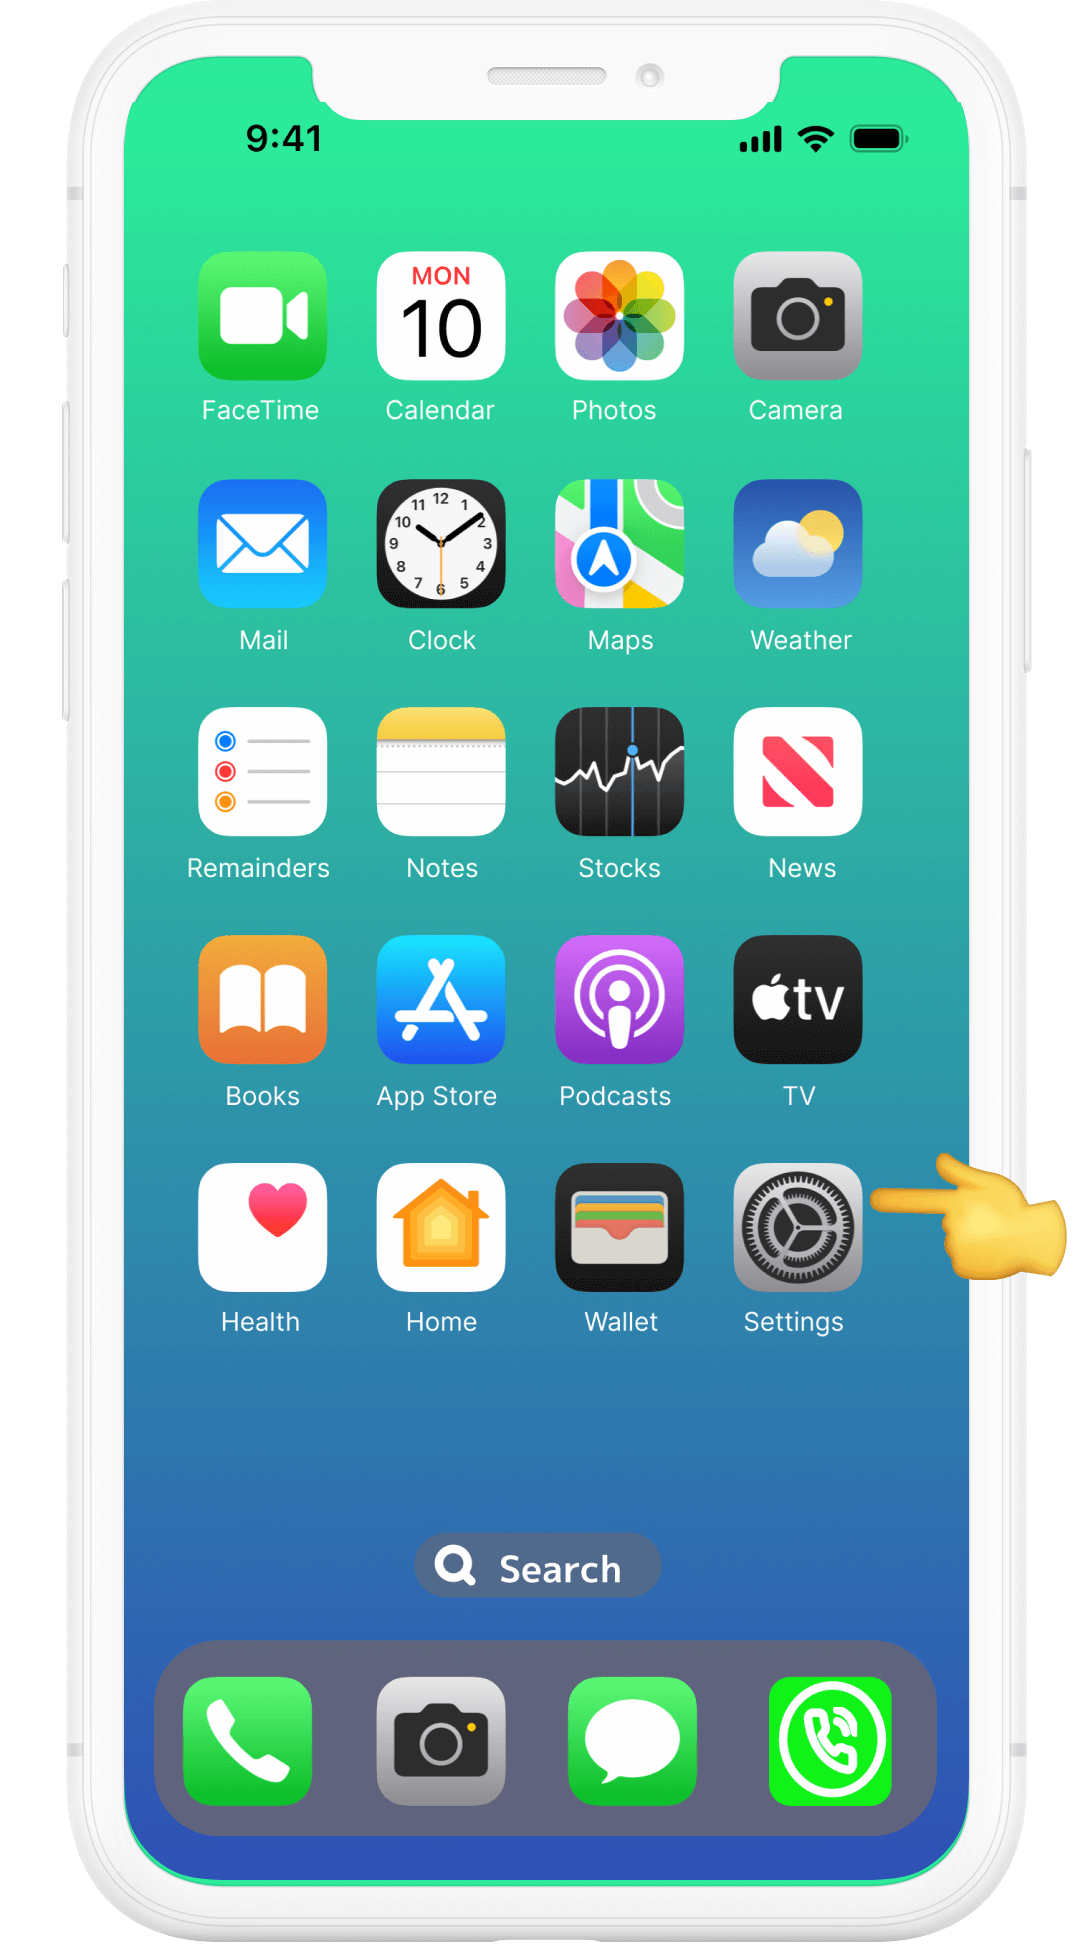
Open Settings
Unlock your iPhone, go to the Home Screen, and tap Settings (the grey gear icon).
02
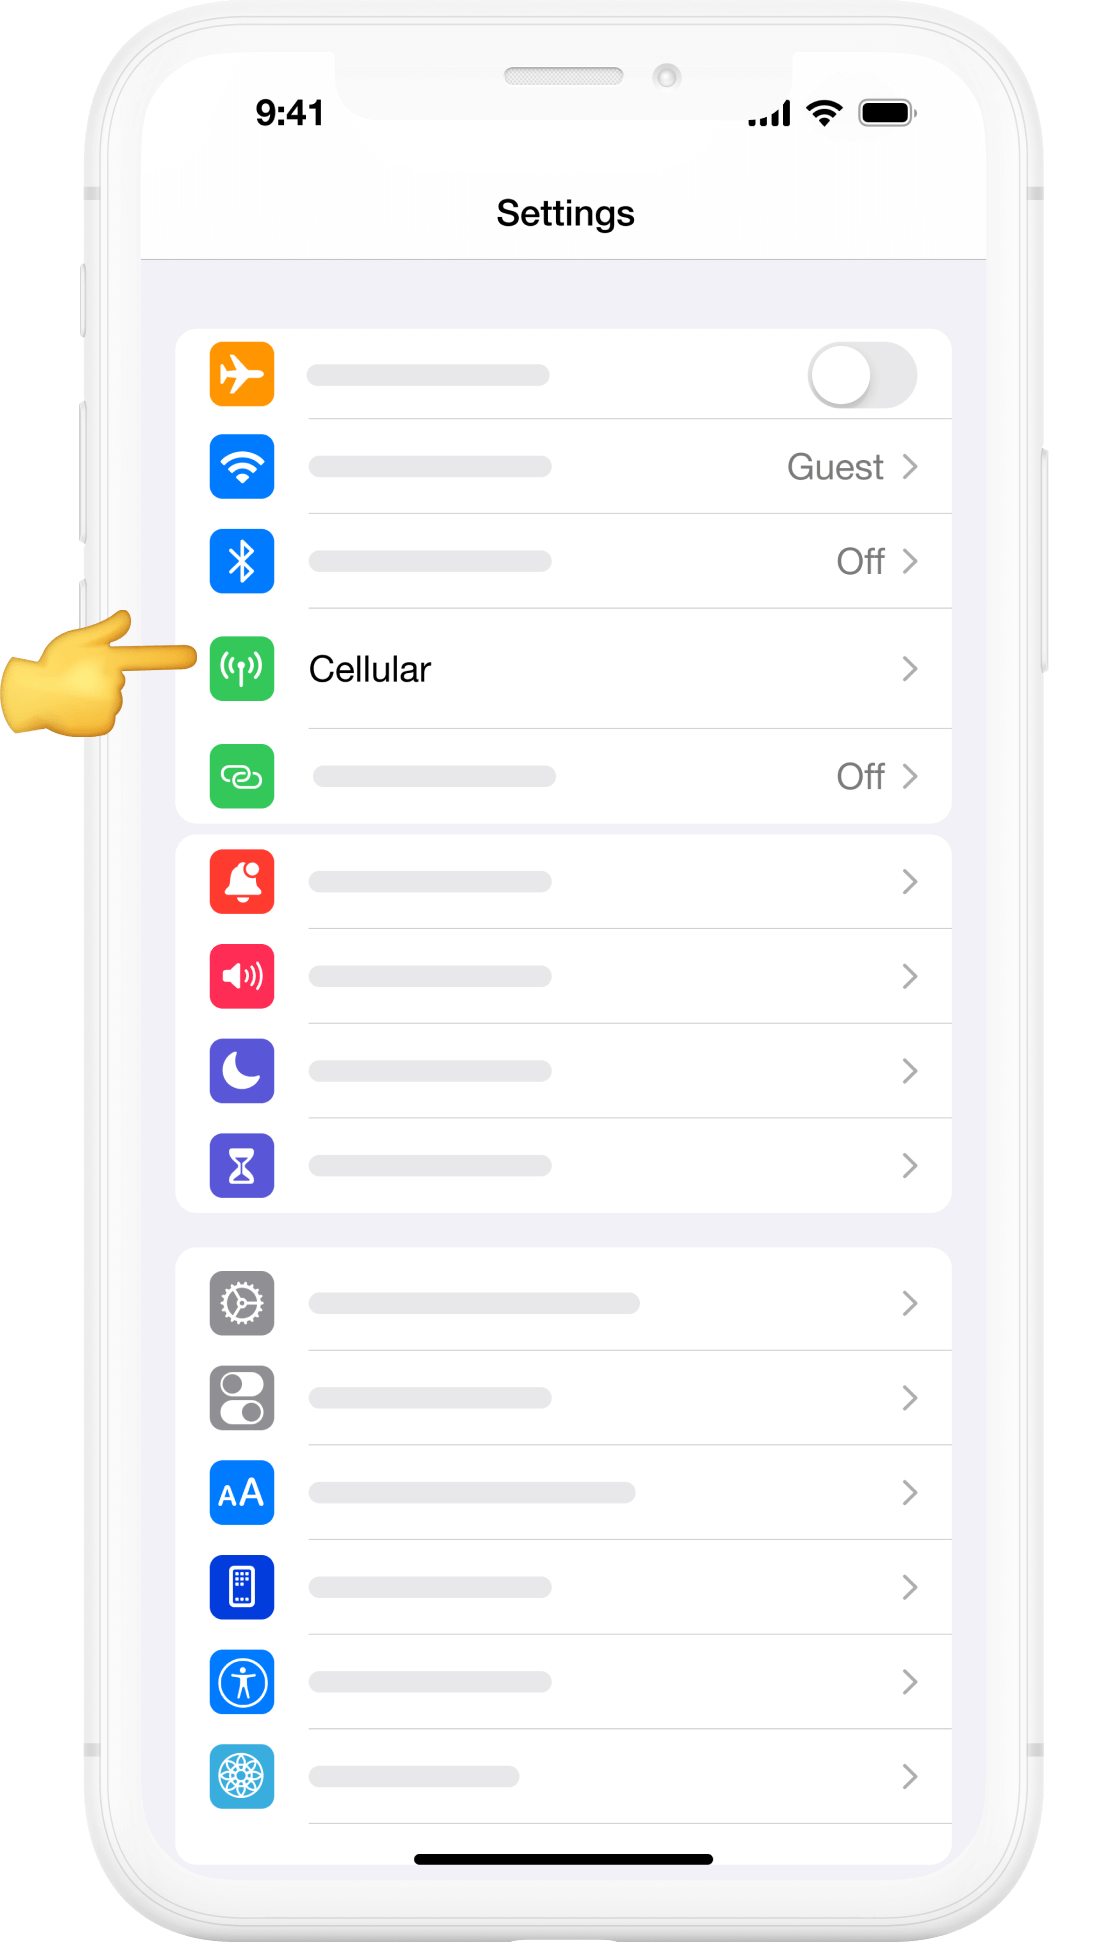
Go to Mobile Data
In the Settings menu, scroll down and select Mobile Data (sometimes called Cellular on some iPhones).
03
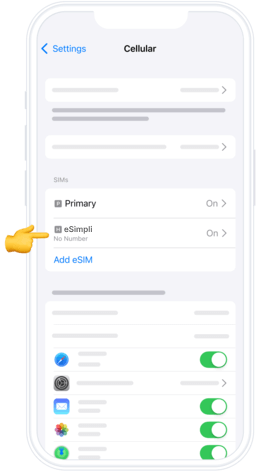
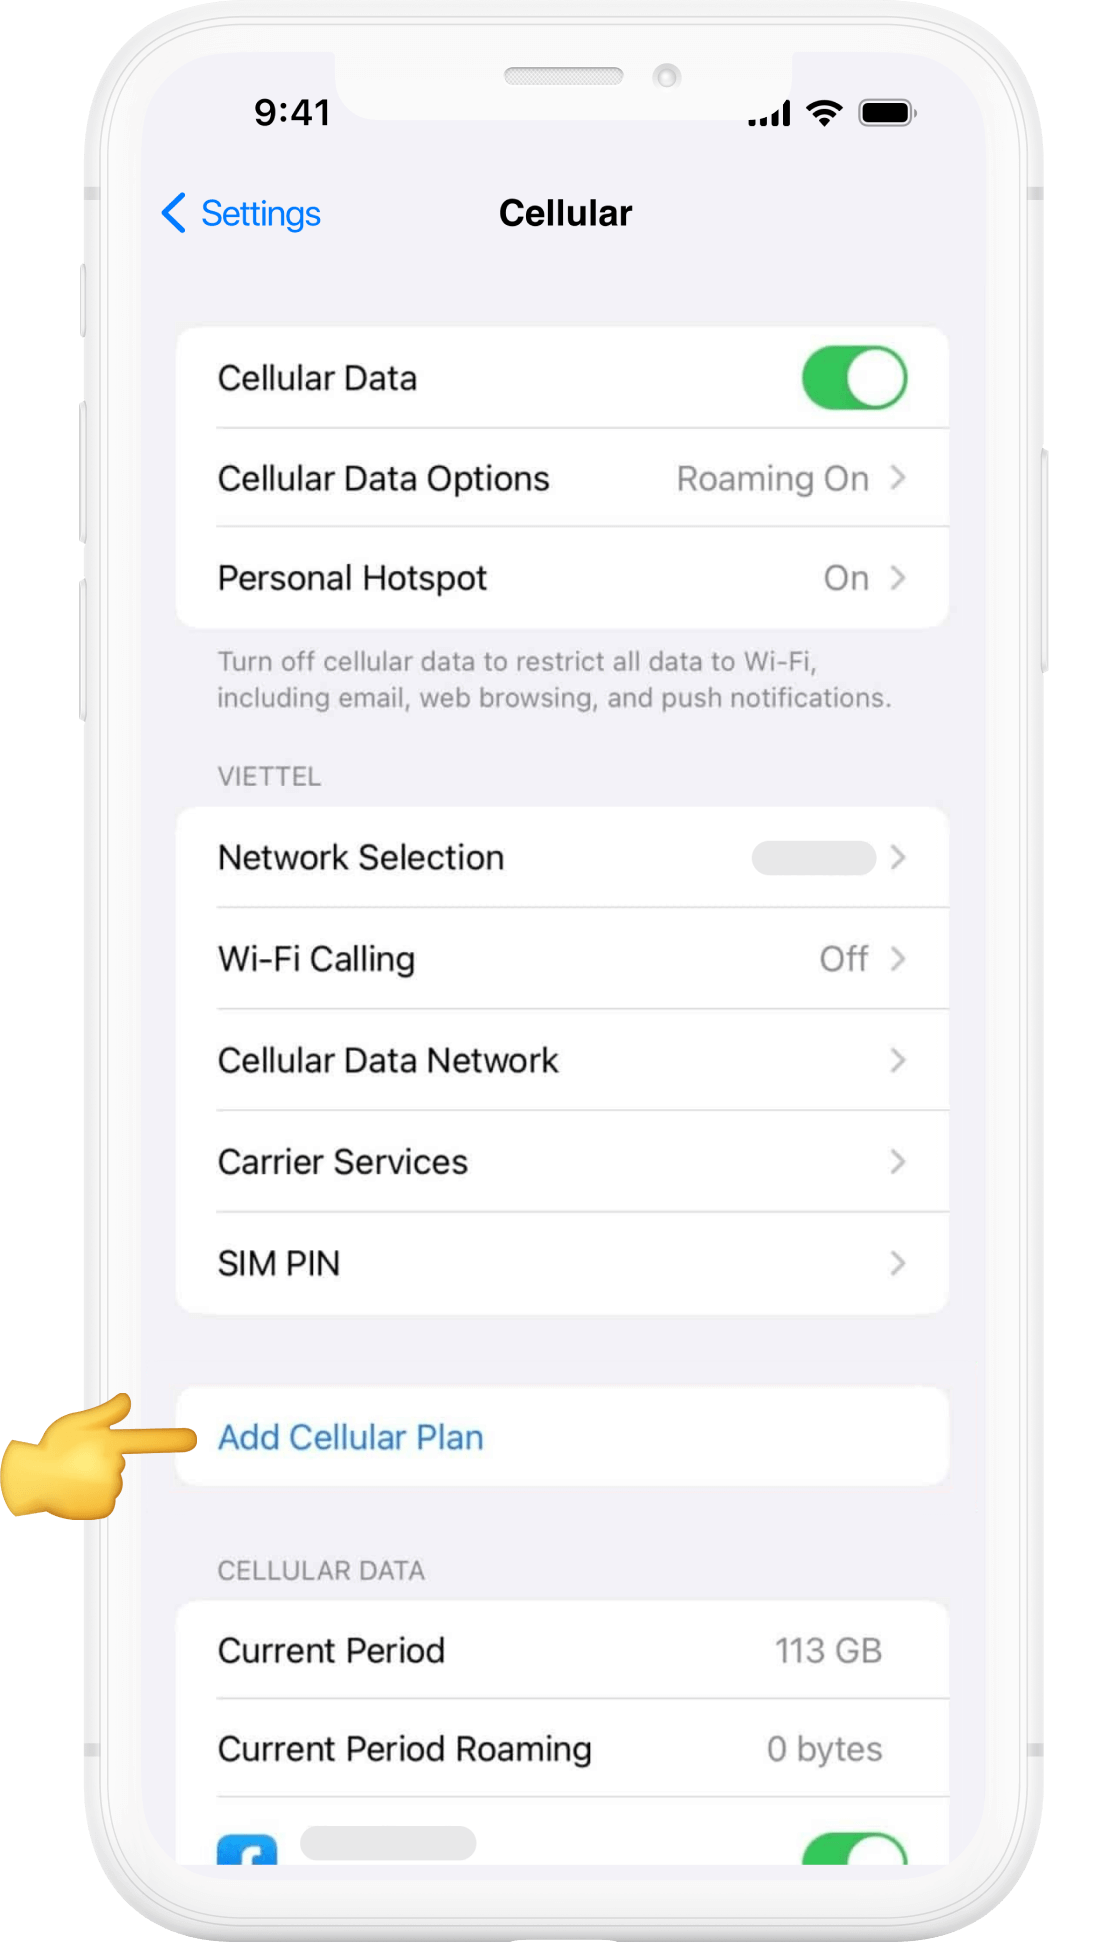
Add eSIM
Tap Add Mobile Data Plan (or Add eSIM) to begin the setup.
04
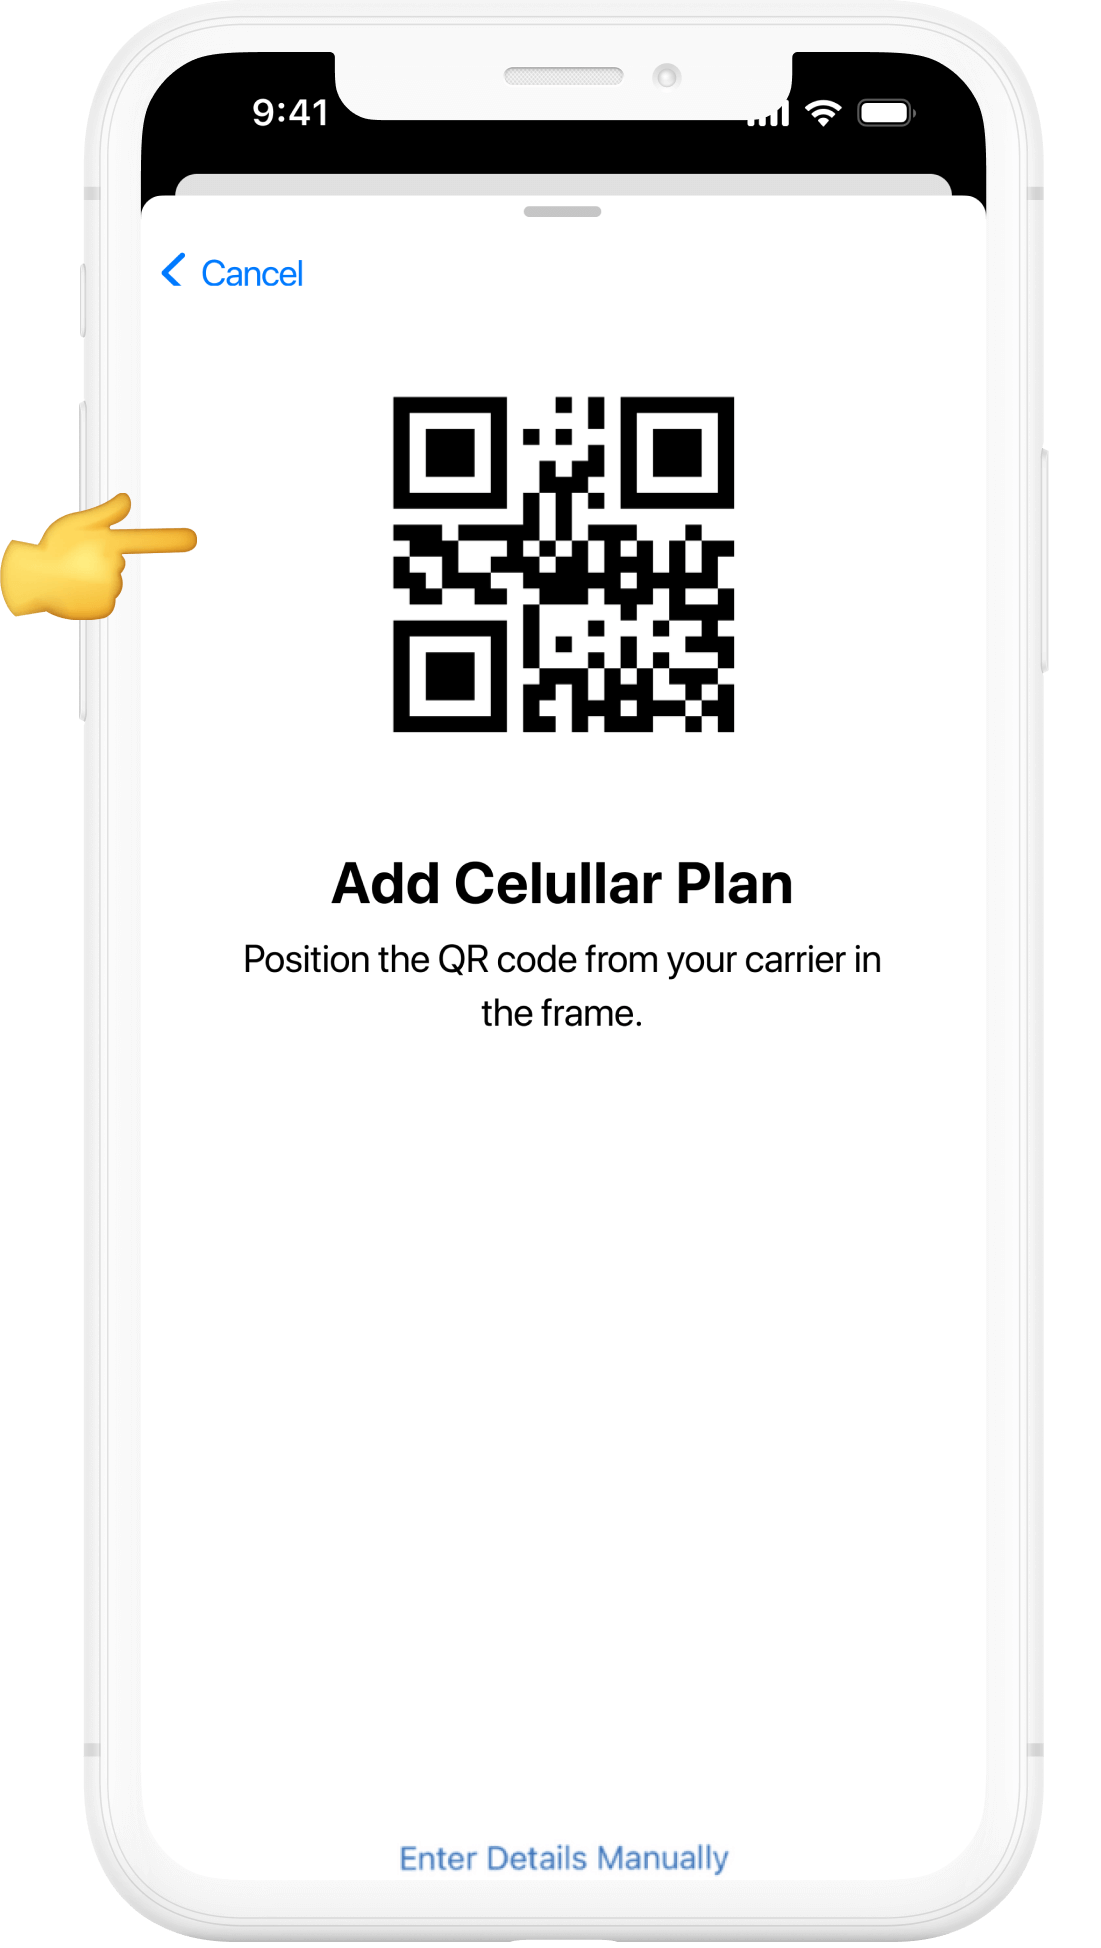
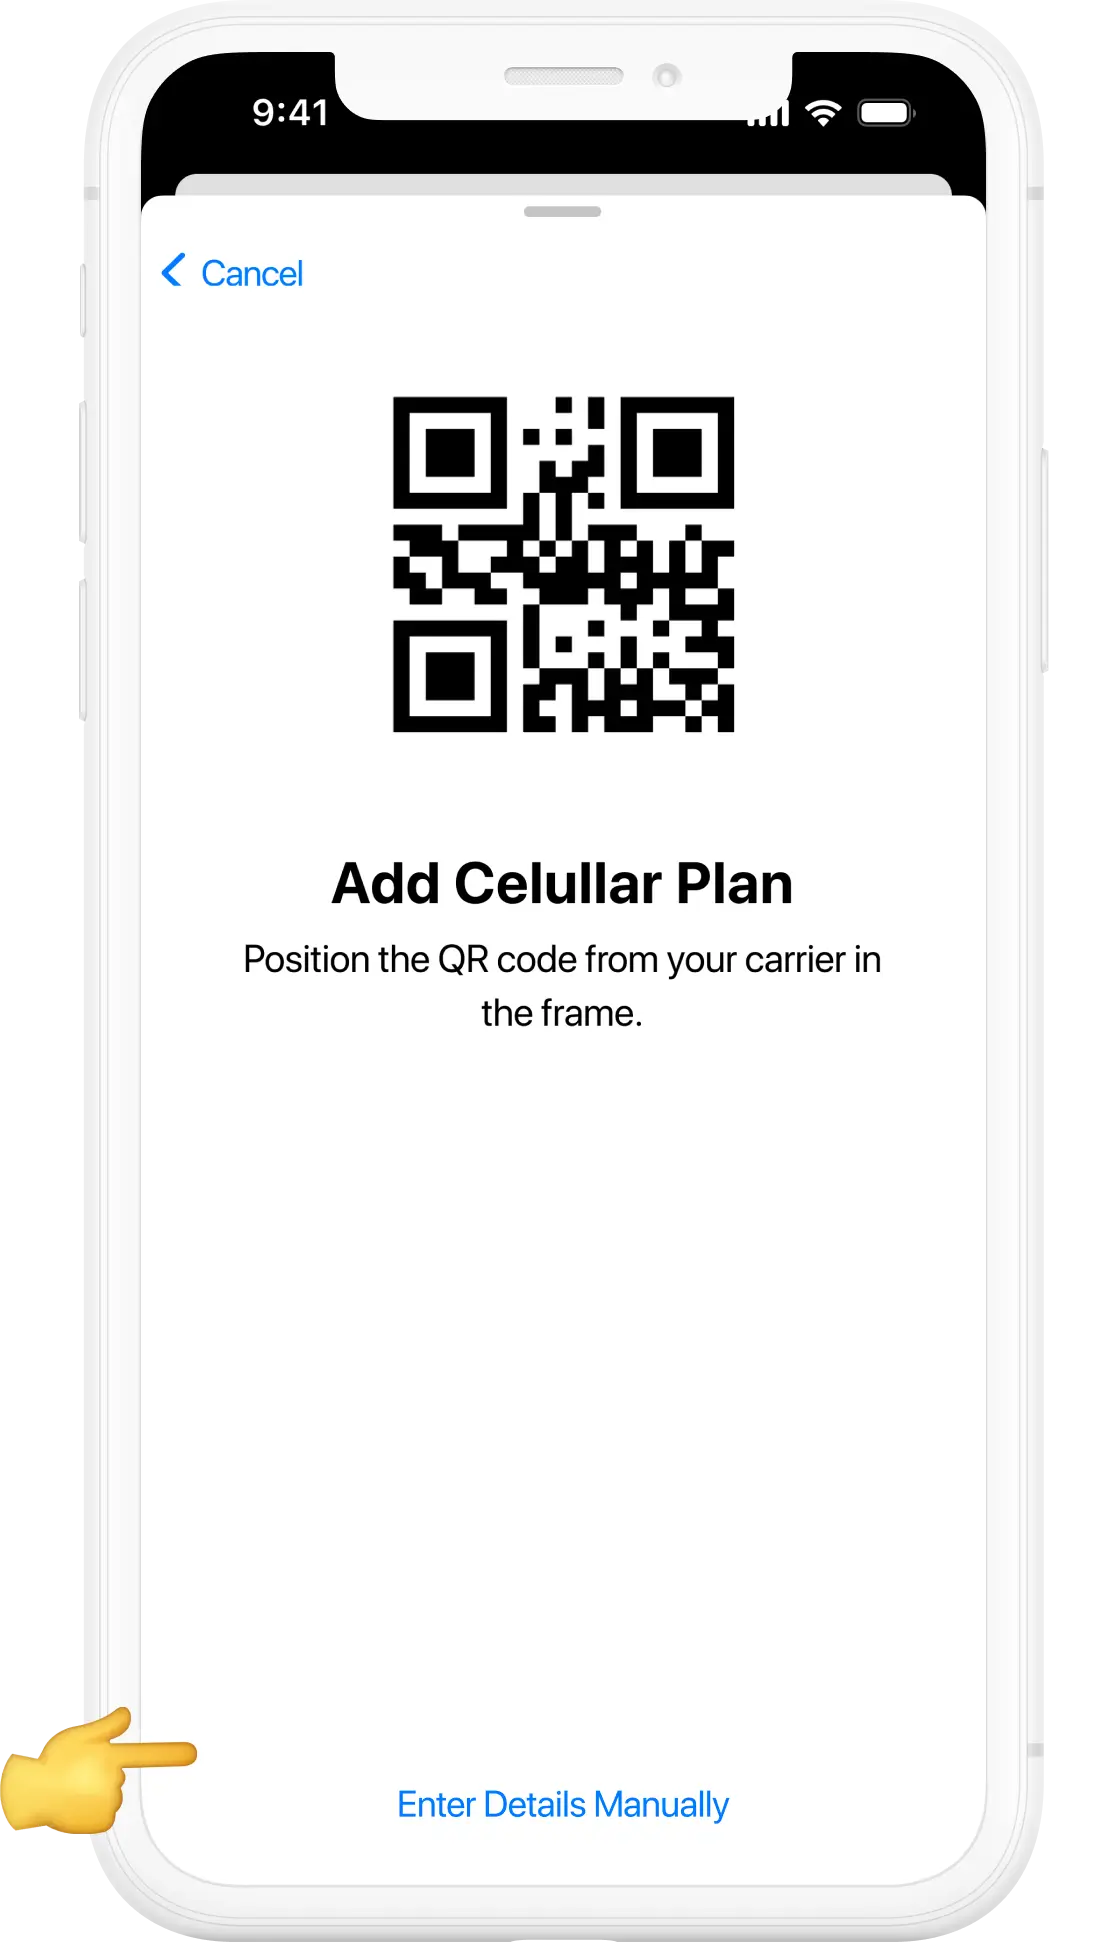
Scan the QR Code
Position your iPhone’s camera over the QR code provided after your eSIM purchase. Wait a few seconds while it is recognised.
05
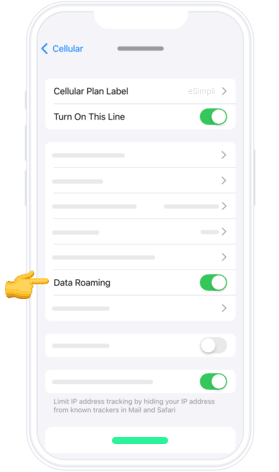
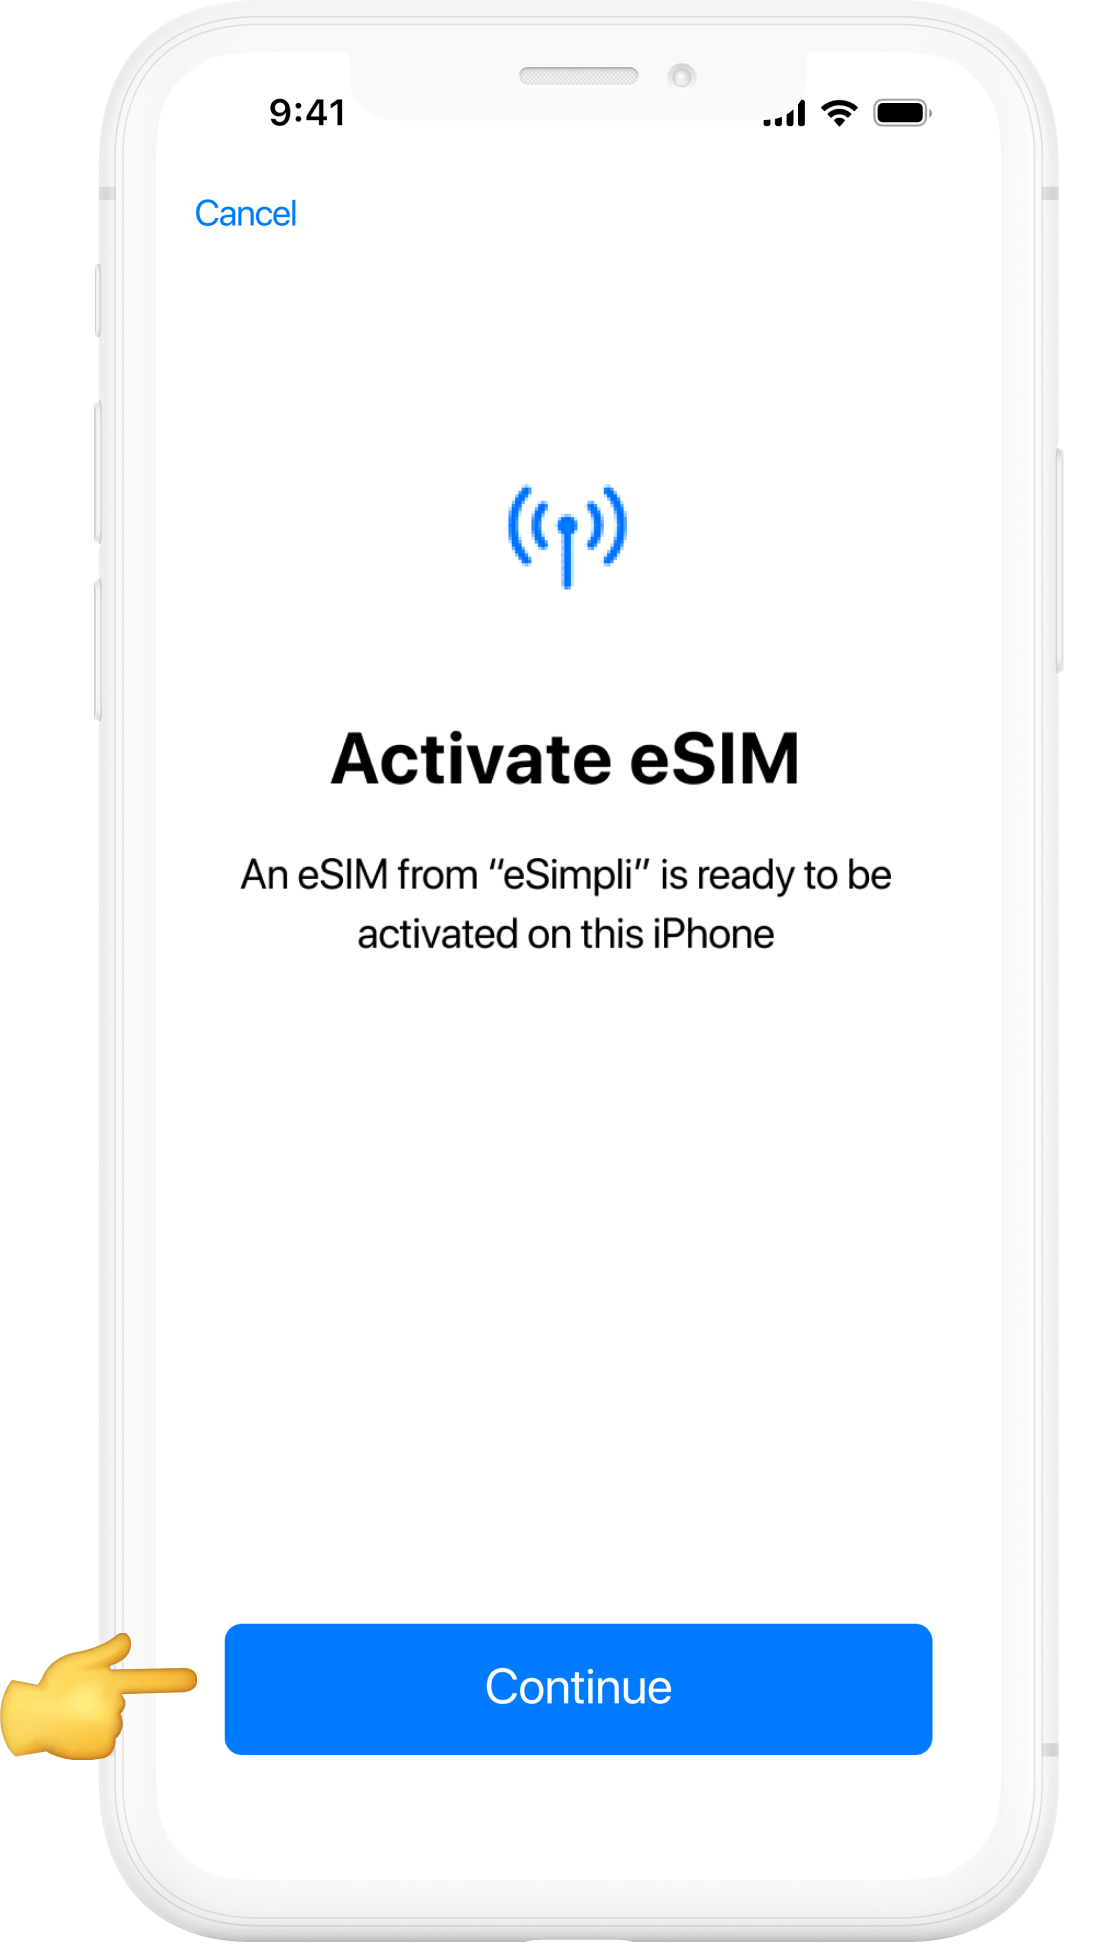
Confirm Activation
A message will appear showing your eSIM details. Tap Continue and then Confirm to activate your plan.
06
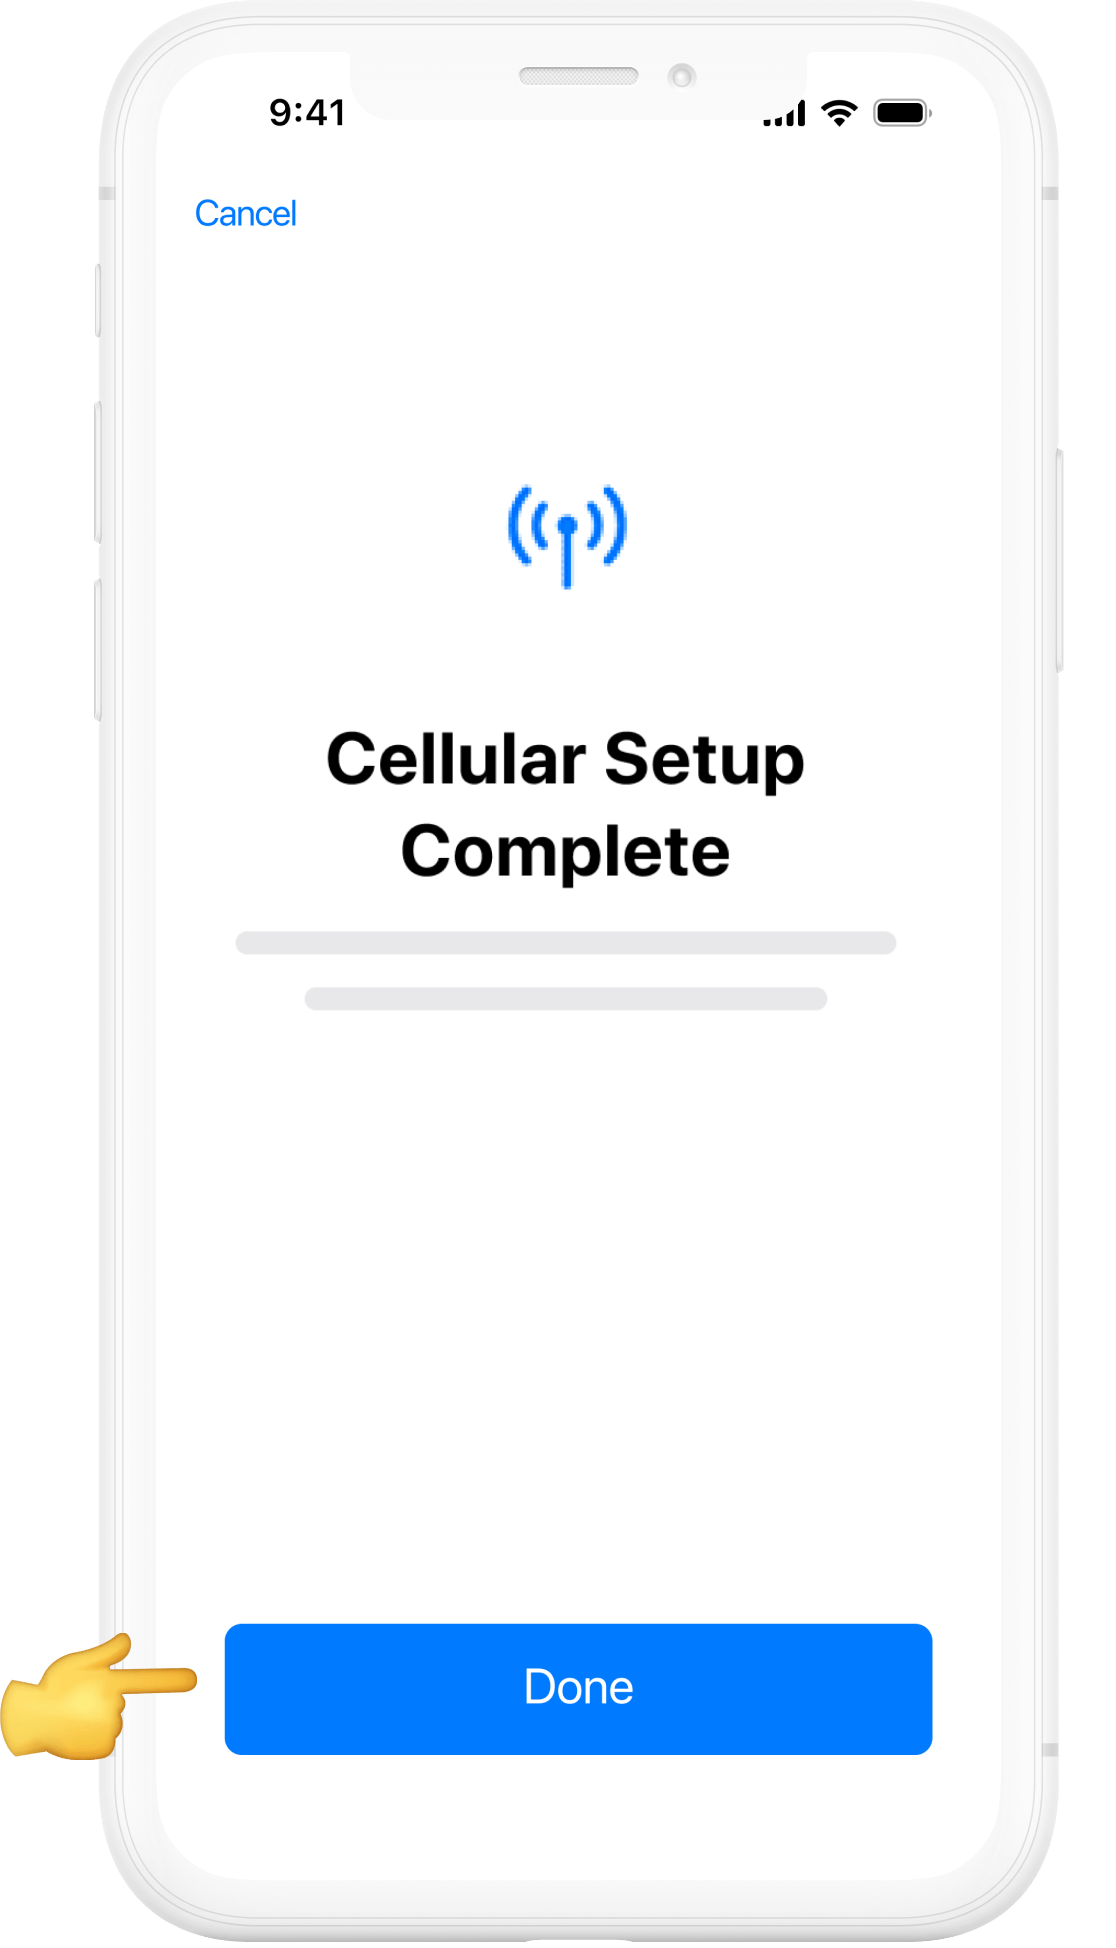
Setup Complete
Once the activation is confirmed, you’ll see Cellular Setup Complete. Tap Done.
Before you begin manual installation, there are a few important points to be aware of:
- Manual installation codes can only be used once.
- Make sure you have a stable internet connection throughout the process.
- Do not remove the eSIM from your device as you will not be able to use it again.
Manual installation guide for your eSIM
01
Accessing the Settings
Start by unlocking your Apple device and navigating to the home screen. Locate the "Settings" app, which is represented by a gear icon, and tap on it to open.
02
Open “Settings” on your iPhone
Next, go to “Mobile Data ”, click on “Add eSIM” or “Add Data Plan” and select “Use QR Code”.
03
Enter Details Manually
Once you get to “Scan QR Code”, select “Enter Details Manually” and follow the steps displayed on your iPhone.
04
Install your data plan
Your iPhone will show you your new data plan.
Press“Continue”and wait for your plan to be installed (this can take a few minutes).