Step-by-Step Guide: Install Your eSIM
Select your installation method
Before you start, please check:
- You have a stable internet connection.
- You’re connected to Wi-Fi or a strong 4G/5G signal.
- Your device supports eSIM.
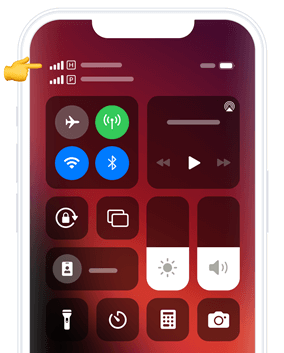
eSIM installation guide with QR code

01
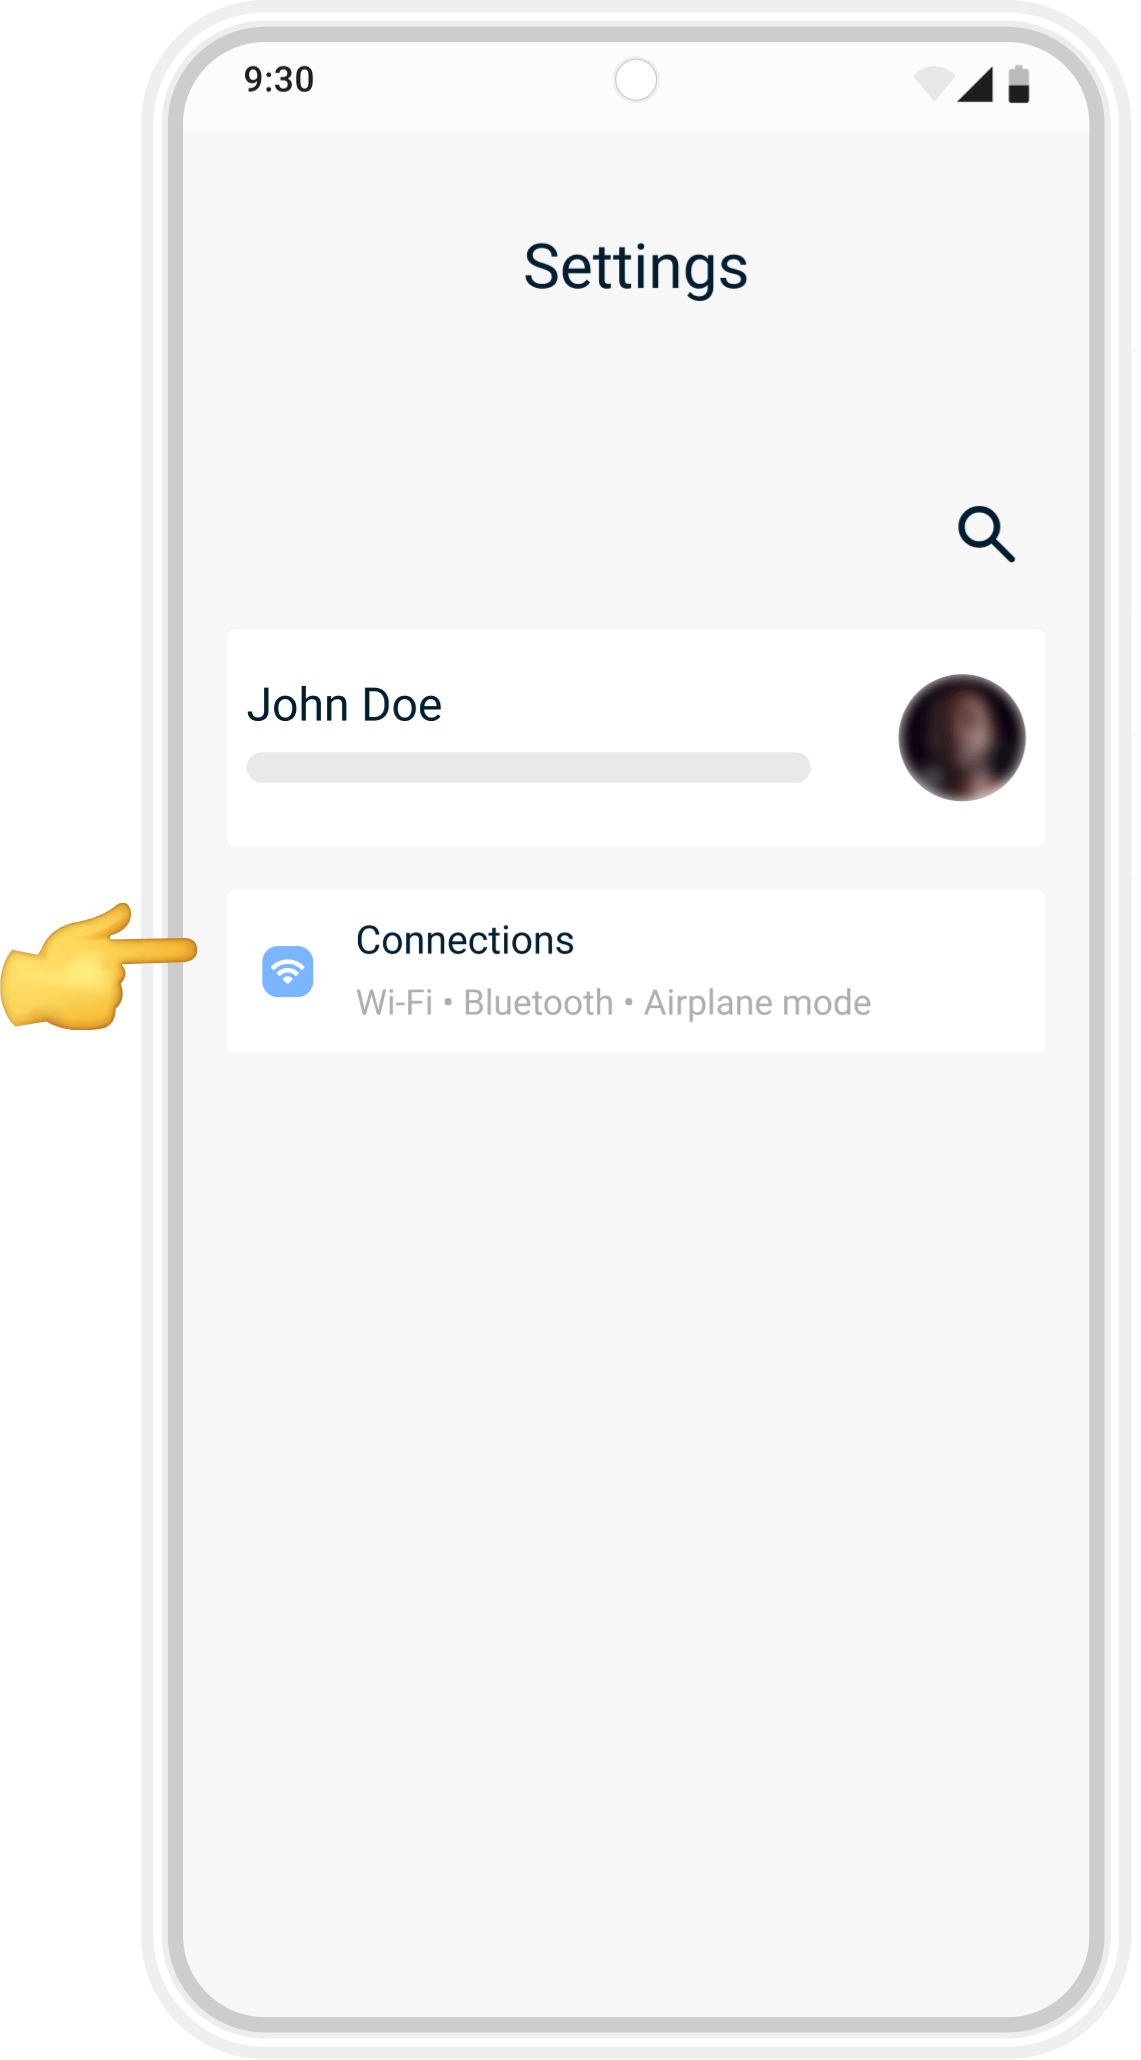
Open Settings
Unlock your phone and go to Settings. Tap Connections (sometimes shown as Network & Internet depending on your device).
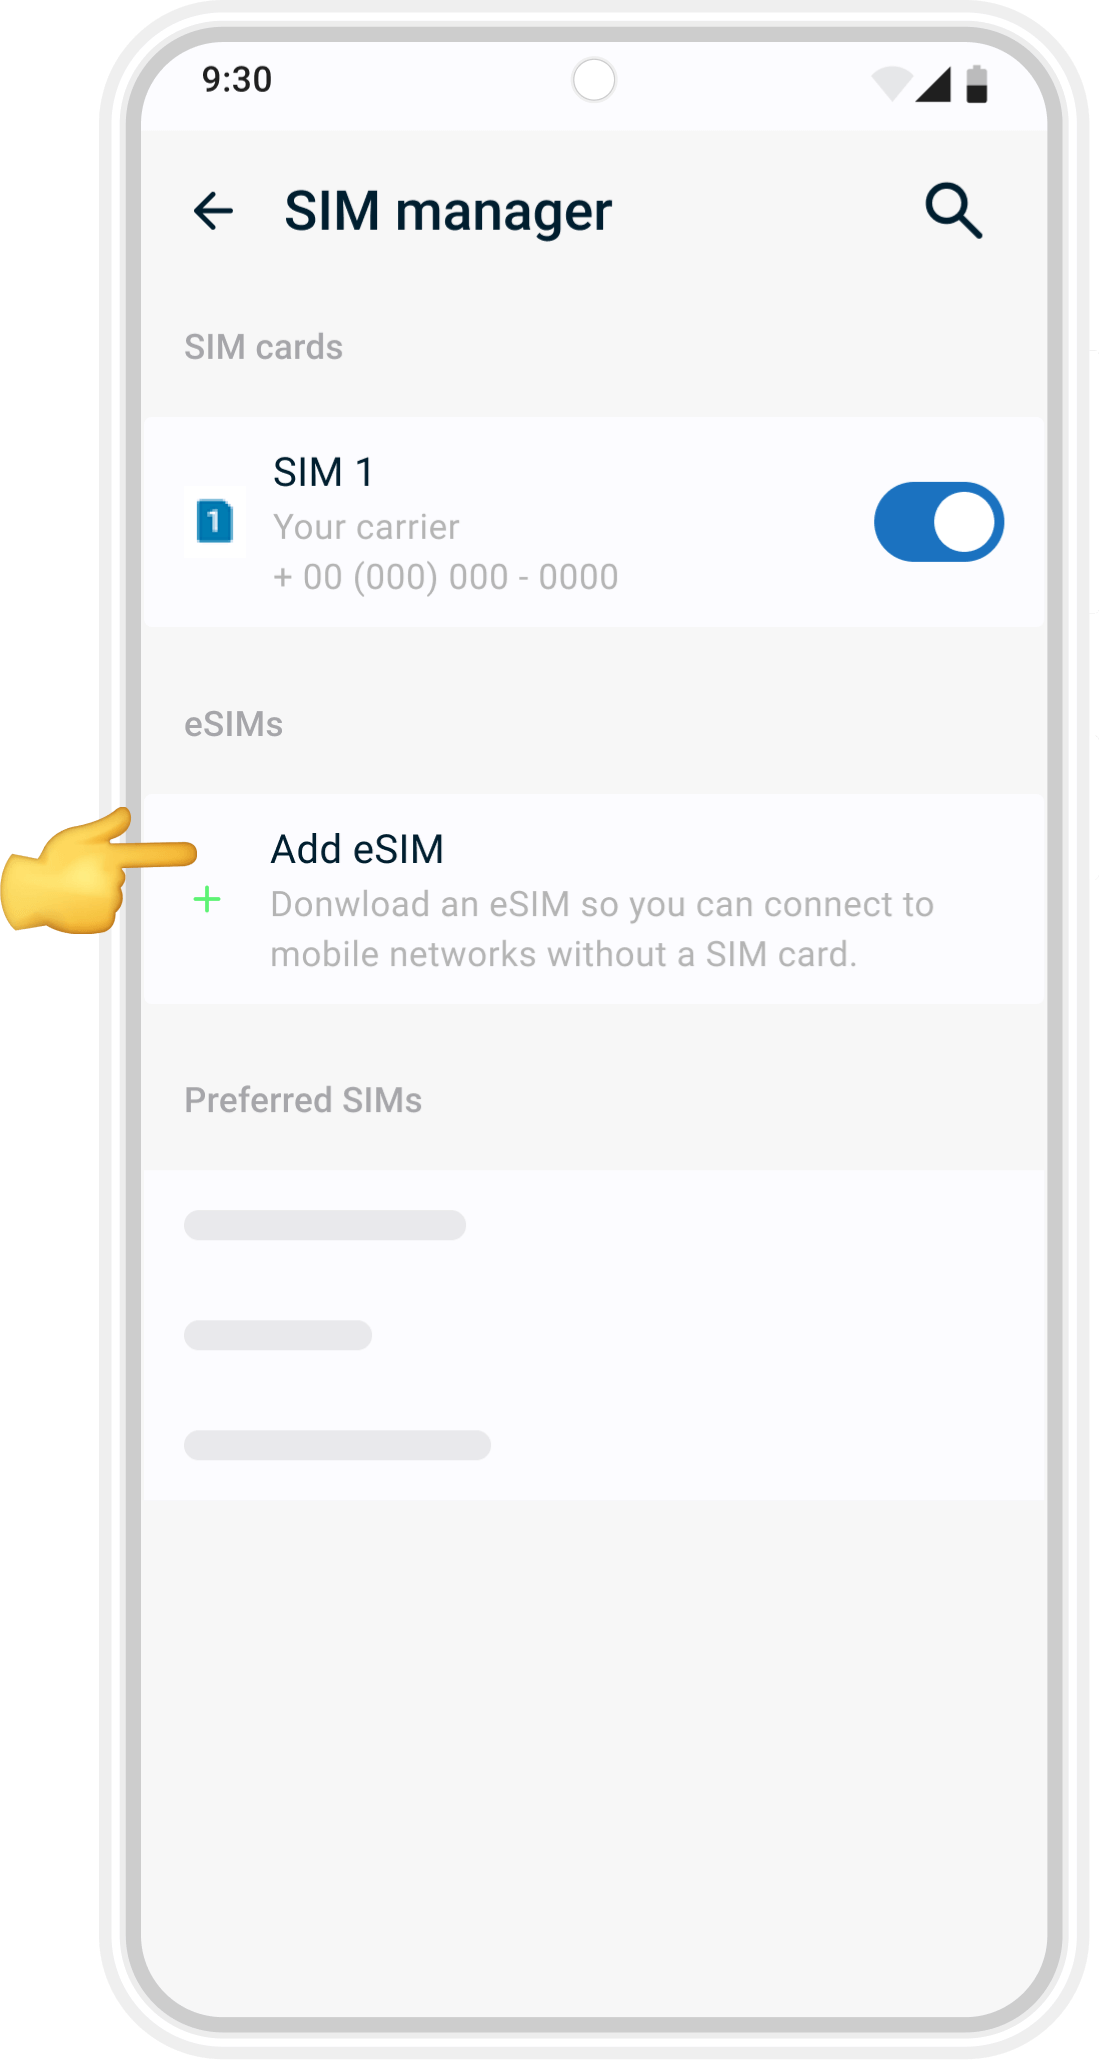
02
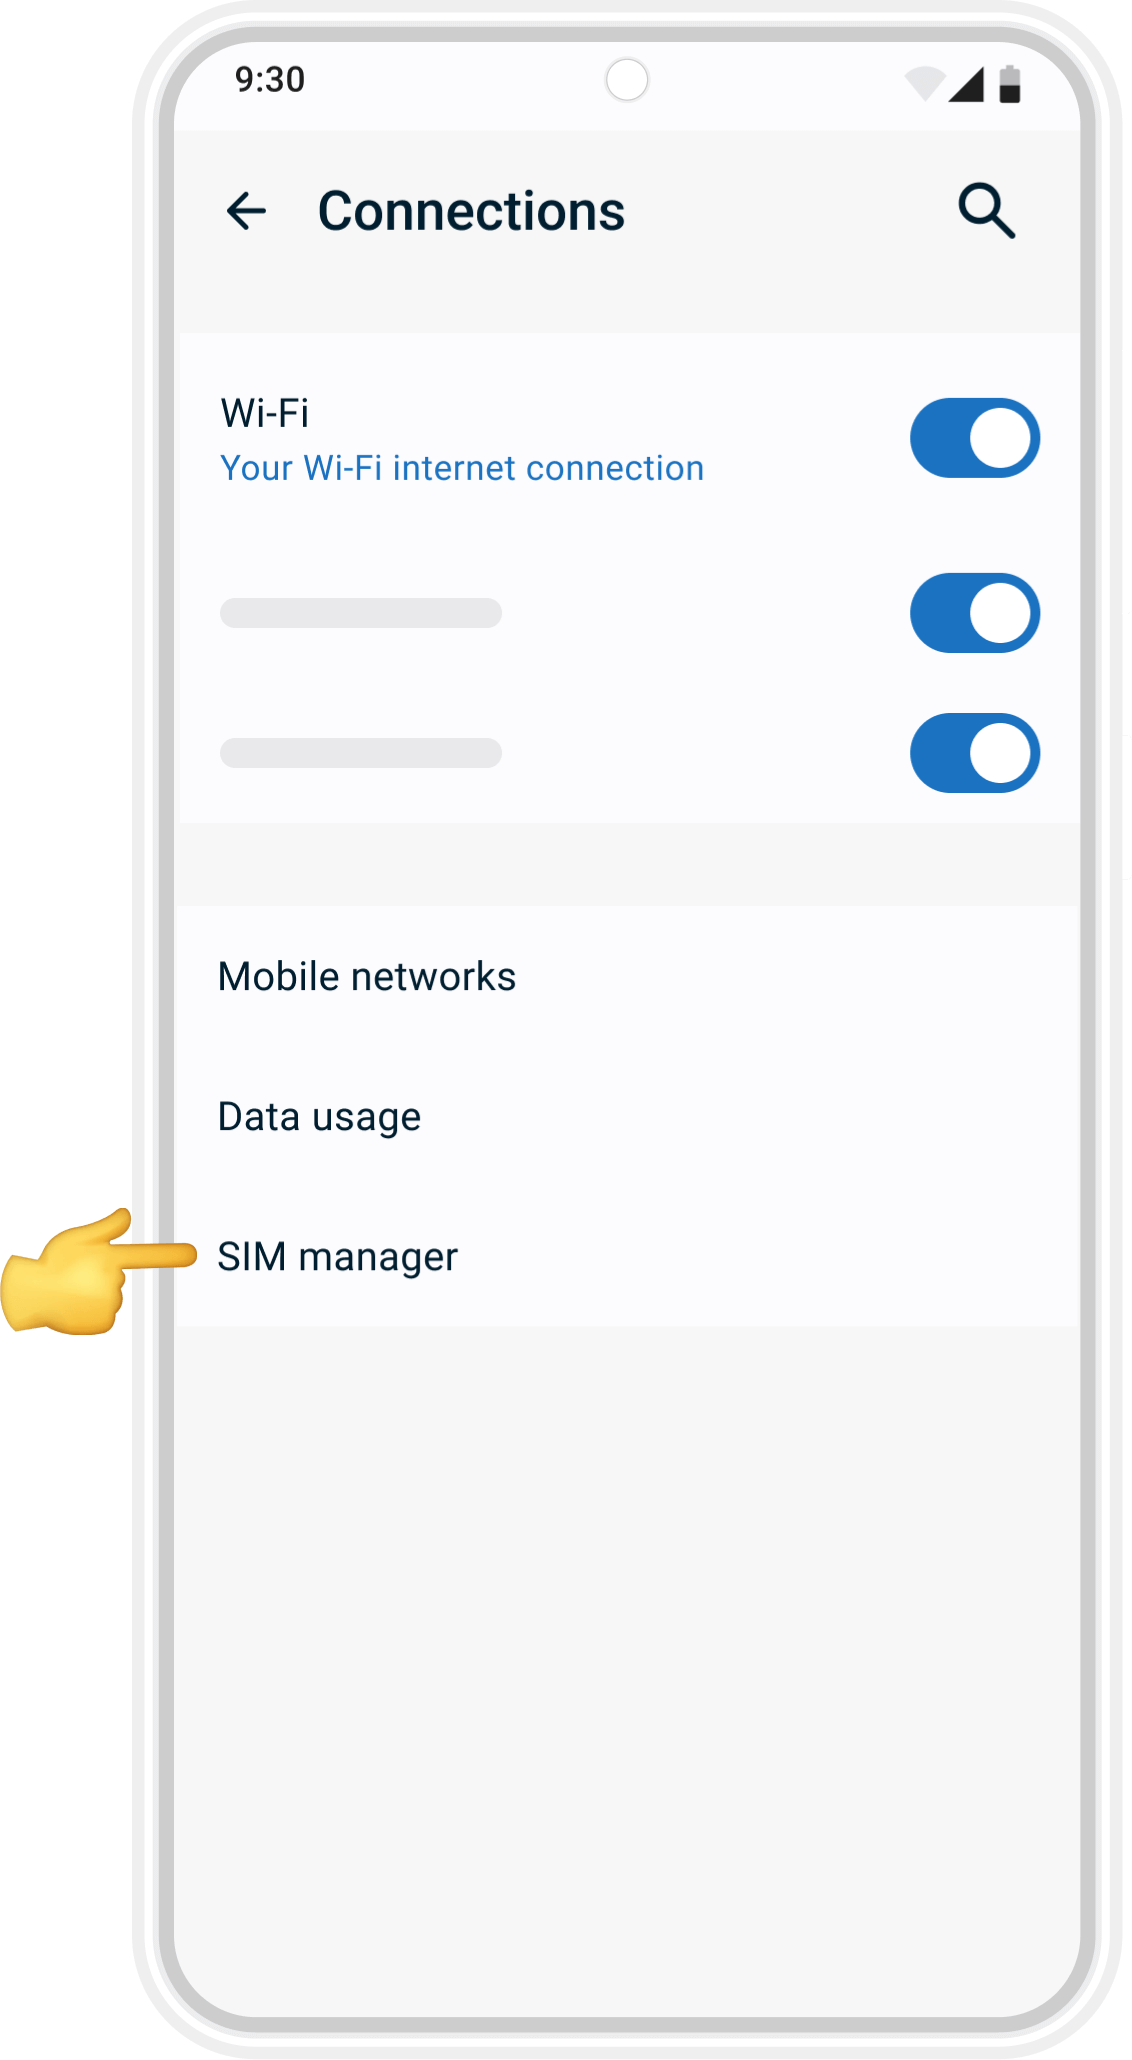
Open SIM Card Manager
In Connections, select SIM card manager (or Carrier on some devices).
03
Add eSIM
Tap Add eSIM (or Add Mobile Plan) to begin setup.
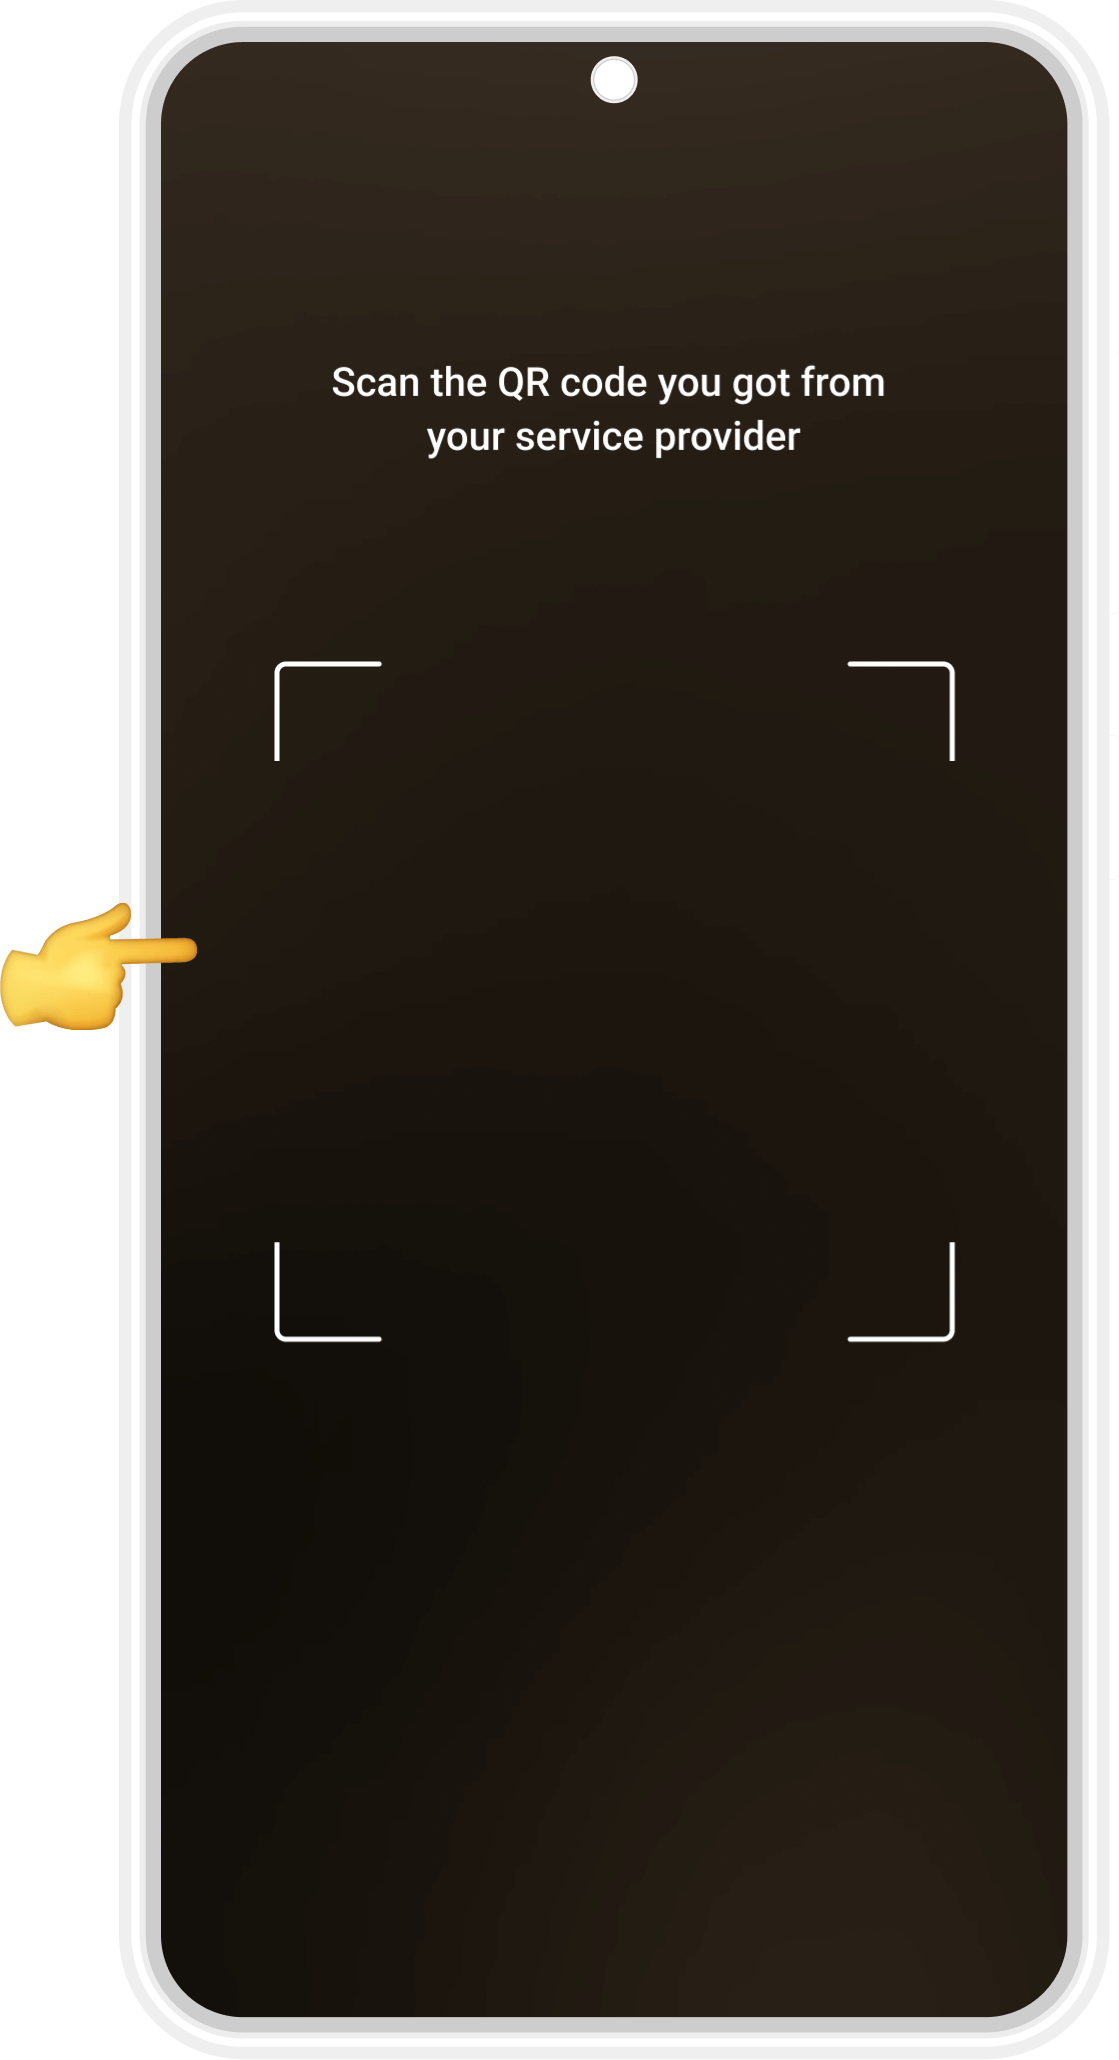
04
Scan the QR code
Use your phone’s camera to scan the QR code you received when you purchased your eSIM.
If scanning doesn’t work, you can enter the details manually.
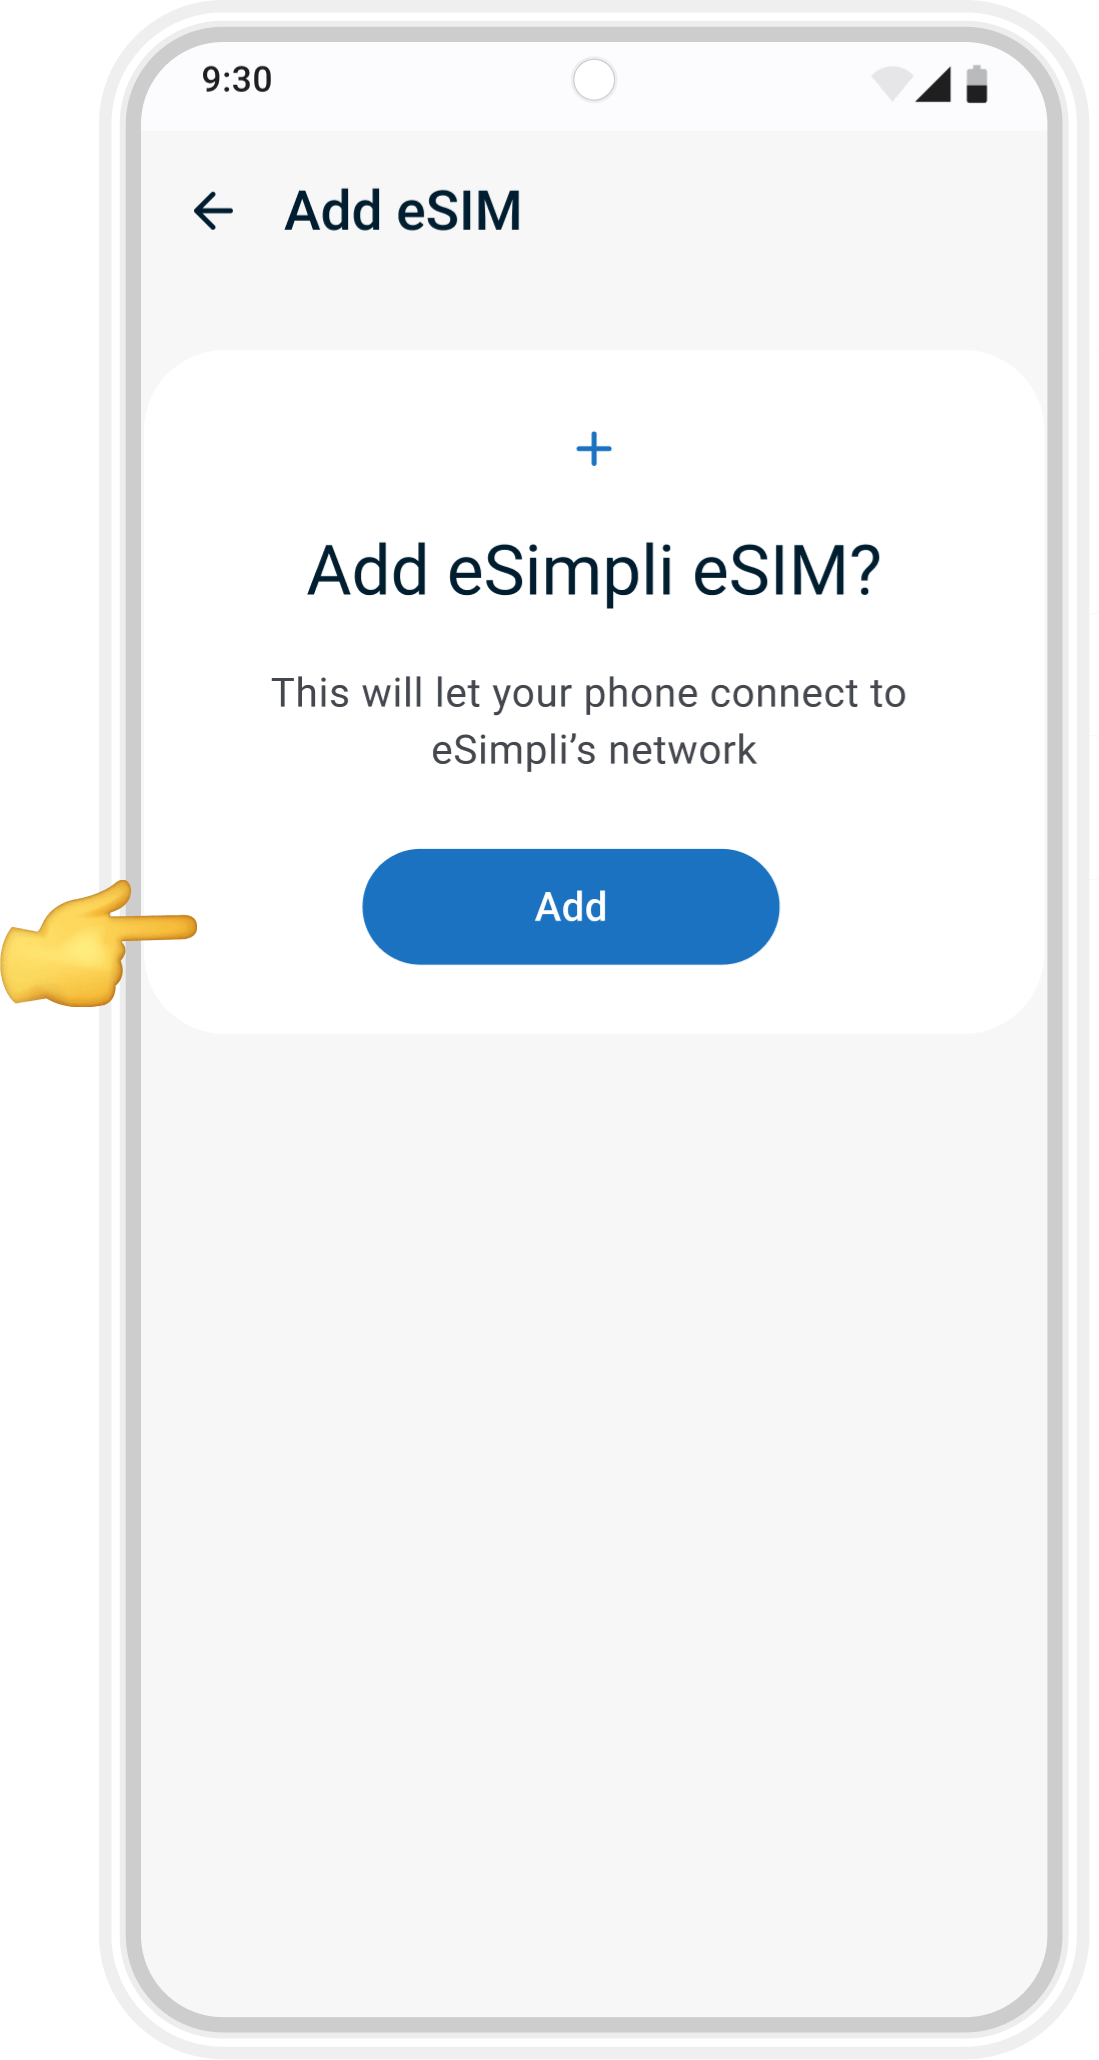
05
Confirm and Add
A message will appear asking to add the new eSIM. Tap Add to confirm.
Before you begin manual installation, please note:
- Your eSimpli manual installation code can be used more than once, but only on the same device.
- Make sure you have a stable internet connection throughout the setup.
- If you delete your eSimpli eSIM, you can reinstall it later — as long as it’s on the same device.
eSIM manual installation guide
01
Open Settings
Unlock your phone and go to Settings. Tap Connections (sometimes shown as Network & Internet depending on your device).
02
Open SIM Manager
In Connections, select SIM manager (or Carrier on some devices).
03
Add eSIM
Tap Add eSIM (or Add Mobile Plan) to begin setup.
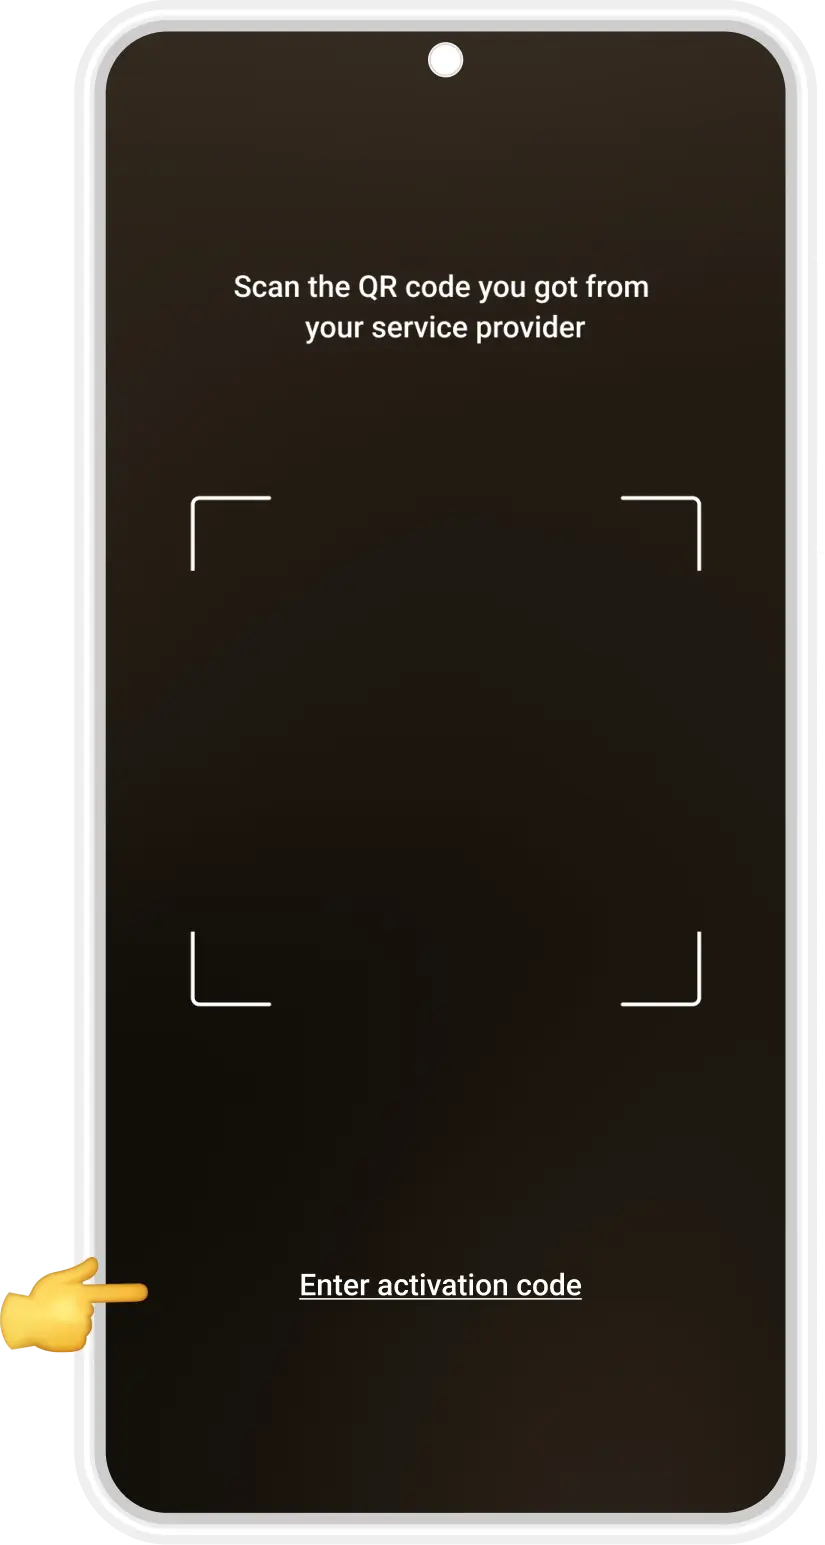
04
Select Manual Setup
Tap Scan QR Code first. When the QR code screen opens, choose Enter Details Manually (or Enter Activation Code) instead.
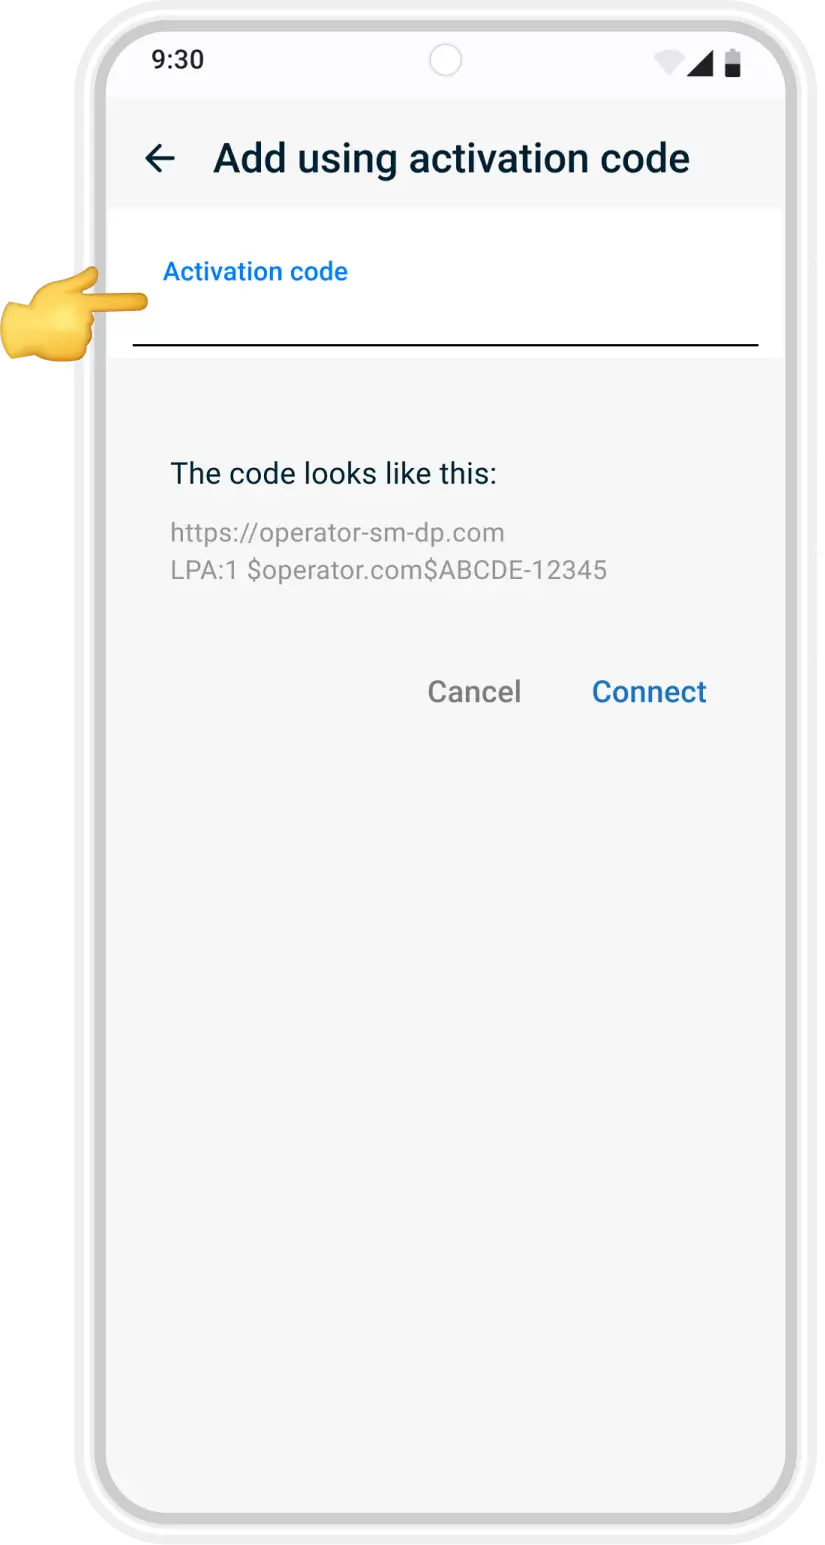
06
Enter Activation Code
Enter the activation code from the email we sent you.
Double-check the details and tap Add.
07
Confirm Installation
Your phone will install the new eSimpli eSIM. Wait a few moments until the plan is added.